
I’ve posted some updates recently on my editing process for Footfall and have gotten a few questions about how I edit my book. In particular, I’ve had some questions about why I am reviewing a hard copy. While I primarily edit electronically, I actually really enjoy reviewing hard copies of my work, both for my day job as a technical editor and for my creative writing work. It also makes me a little sad that, in this day and age when we are blessed with the ability to do all revisions through out word processor, few people actually look at hard copies anymore and the real benefits can get forgotten. So, I’m going to cover some reasons why I like to occasionally review my work in hard copy form and how I get the most out of that review.
Why Review a Hard Copy?
While I do enjoy reviewing hard copies, it’s not feasible to do it after every draft. In general, what works for me and what I recommend is to print and review a hard copy at two stages in the revision process, the first being after you’ve settled on your major structure (i.e., right after your first or second re-write). Why? Well, personally, I get a bit too attached to my work, meaning I can either be too light with edits or I can be hypercritical and over edit or fall into a self-hate fugue. Neither of these options are great or helpful for the revision process, so I need to force a degree of separation between myself and what I’m writing. Reviewing a hard copy does this for me. I think switching formats (from computer screen to paper) makes my work seem different enough that I don’t feel as close to it. I find that when I review a hard copy, I see the big picture issues clearer, without falling into self-criticism. Plus, you can take a hard copy more places than a computer (coffee shops without outlets, your backyard, the beach, etc.) which means, for a little while, you can change up your location a bit, which is refreshing.

The second time I like to review a hard copy is for proofreading and fine-detail editing. This is something I’ve found helpful in my day job but I often forget when it comes to my creative writing. I see more issues with sentences on the page when I’m looking at a hard copy. I don’t know why, maybe it has to do with that level of separation I mentioned earlier. Either way, I highly recommend this step before sending your book/story out for review or publication (particularly if you aren’t working with a professional copy editor). You’ll catch more typos and grammar/punctuation issues than just looking at the page.
How to Review A Hard Copy of Your Book
So, you’ve decided it’s time for a hard copy review of your book. Great! What’s next? Like any part of the writing process, there are some steps I like to follow for my review process:
- Printing prep and printing
- Review
- Comment/revision incorporation
I’ll go into detail on these steps below, but the important part to keep in mind is that each step builds off of the previous step, so even when preparing for printing you’re setting yourself up to make better edits and improve your work.
Printing
Before you hit that print button, take a moment to do some preliminary pre-printing checks and prepare your document so it looks the best and easiest to read in a hard copy format. Here is my checklist to help me ensure my document is readable and I won’t waste unnecessary paper:
- Run spell check
- Make sure the first page is a cover with the story title and my name — for fanciness and easy location if I leave it somewhere
- Apply some paragraph level formatting to make it easier to read — I find this website offers good advice on formatting a manuscript, which is also helpful when querying
- Scroll through the whole document one last time to make sure I don’t have any blank pages or extra spaces between paragraphs
After running through the preliminary checklist, it’s time to print the document. Now, you have a few options when it comes to printing. If you have your own printer, the decision may be easy: print it yourself! However, remember that if you’re printing a full, novel-length manuscript (50,000+ words), you could be printing hundreds of pages. That is a lot for most home printers to handle, so make sure you’ve got enough paper and your ink cartridges are full.
If you don’t have your own printer or don’t want to print yourself, it’s up to you where you want to go to get it done. I personally prefer going through a professional service, like FedEx or Staples, only because I can get it done quickly (same day) and have a lot of paper and binding options. These services can rack up the price for thick manuscripts, though, so if price is an issue, you should look into budget printing services online that will ship to you. I haven’t used any, but have seen Best Value Copy recommended. Lastly, you can always check in with your local library. Some small libraries have flexible printing options, and will do discounts for large print jobs, but you have to talk to the librarian first.
Finally, when you print your hard copy, keep a few things in mind regarding the print specifications:
- Double or single-sided — Let’s face it, hard copy prints use a lot of paper. If you want to save a few trees, print double-sided, but choose a higher-quality paper so the ink doesn’t show through the other side.
- Paper weight — Not everyone will care about this, but I like the tactile sensation of a good-quality higher weight paper. Most standard office paper is around 20 lb, which does not do well for double-sided printing (show through). I like something a bit heavy, like 28 or 32. Remember that card stock is 80 lb, so don’t go too high or your paper will be stiff!
- Recycled paper — As mentioned, you will be using a lot of paper, and some might worry about the environmental impact. Luckily, it’s much easier to find recycled paper these days, particularly if you go through a professional service. Ask them what options they have.
- Binding — If you’re printing your own or going to the library, you may not have many options here. I would recommend getting some big, heavy duty gator clips to keep your pages together. However, if you’re using professional service, I prefer spiral-binding over comb-binding because you can flip the pages all the way around, making it easier if the book is just in your lap. If you go full-on book binding, like you might through a publishing service, that’s awesome! I’ve never done it, but am curious about what that experience is like.
Review Process
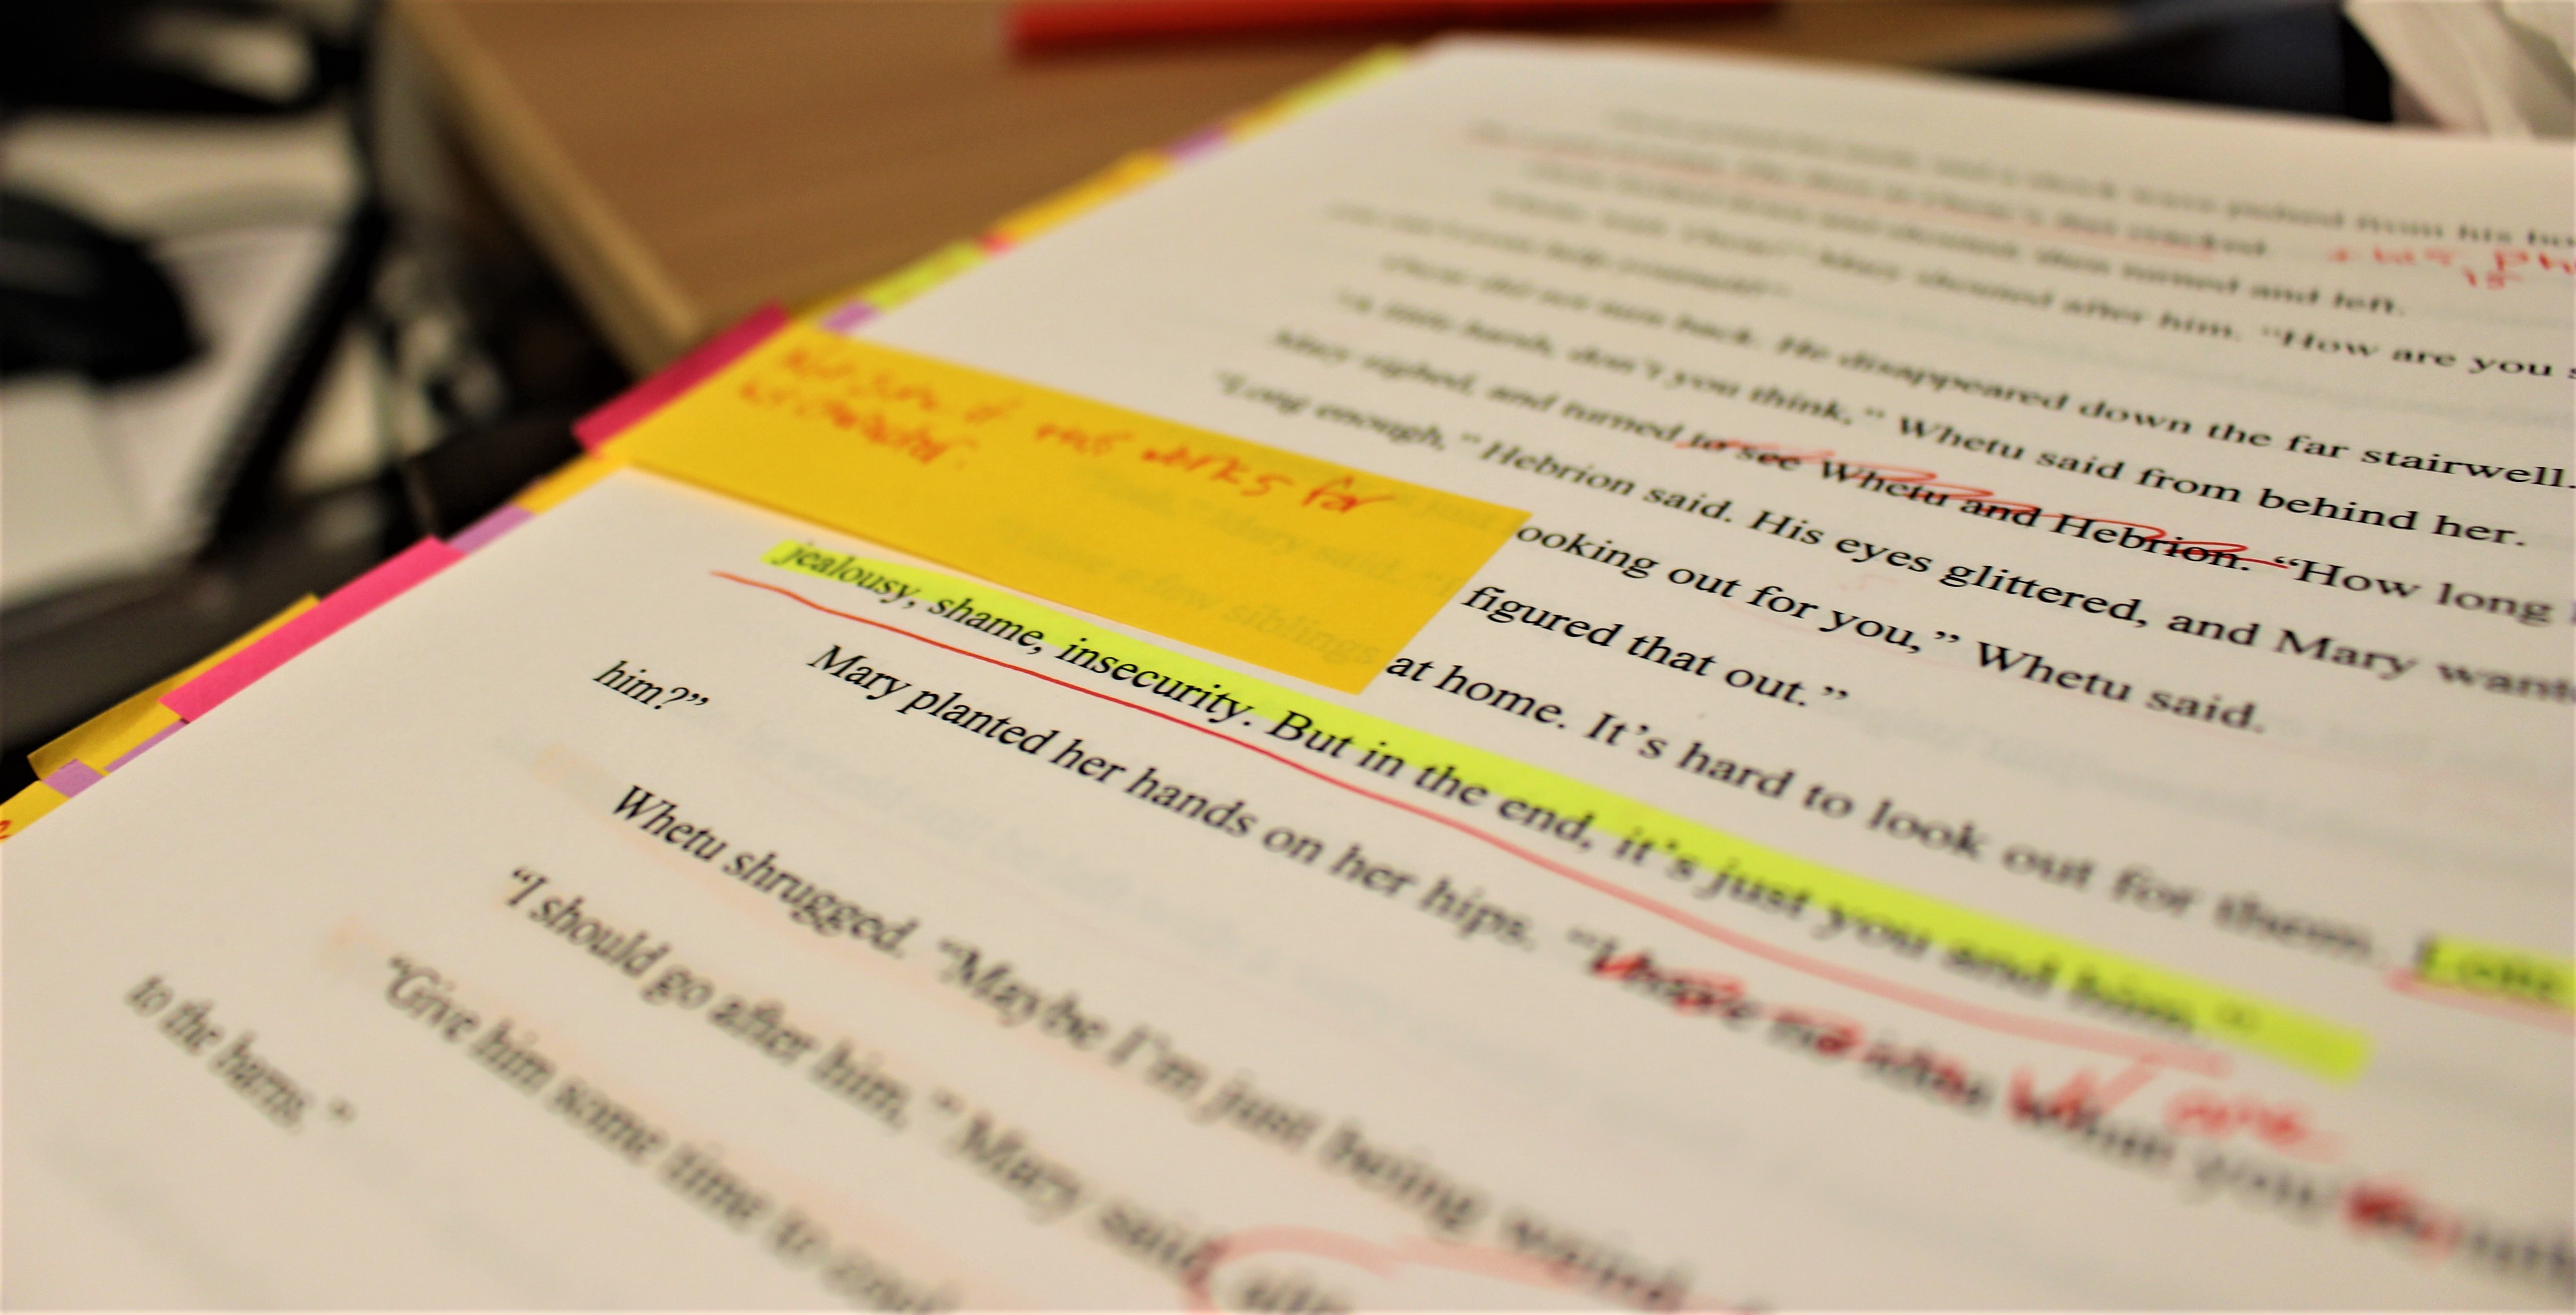
Once you have your hard copy, it’s time to review! However, I would recommend figuring out a way to compartmentalize your comments. Sometimes it can be a bit daunting holding a 200-page manuscript in your lap and worrying about all the things you need to catch. To avoid overload freeze, I’d suggest deciding on a few categories of things you want to keep an eye out for while you’re reviewing. For me, I wanted to look for plot holes, worldbuilding holes, character issues, and general inconsistencies. I assigned each category a color and bought highlighters and post-its in those colors to help me flag the edits with the right category. I found this system to be SUPER helpful this time around, and kept me from feeling overwhelmed. I also used a very nice, smooth red pen to make notes between lines and in the margins. Obviously, a red pen is not necessary—use whatever color you like. I like red because it’s easy to see and I already own a lot of nice ones (again, I’m an editor at my day job).
Transferring Edits
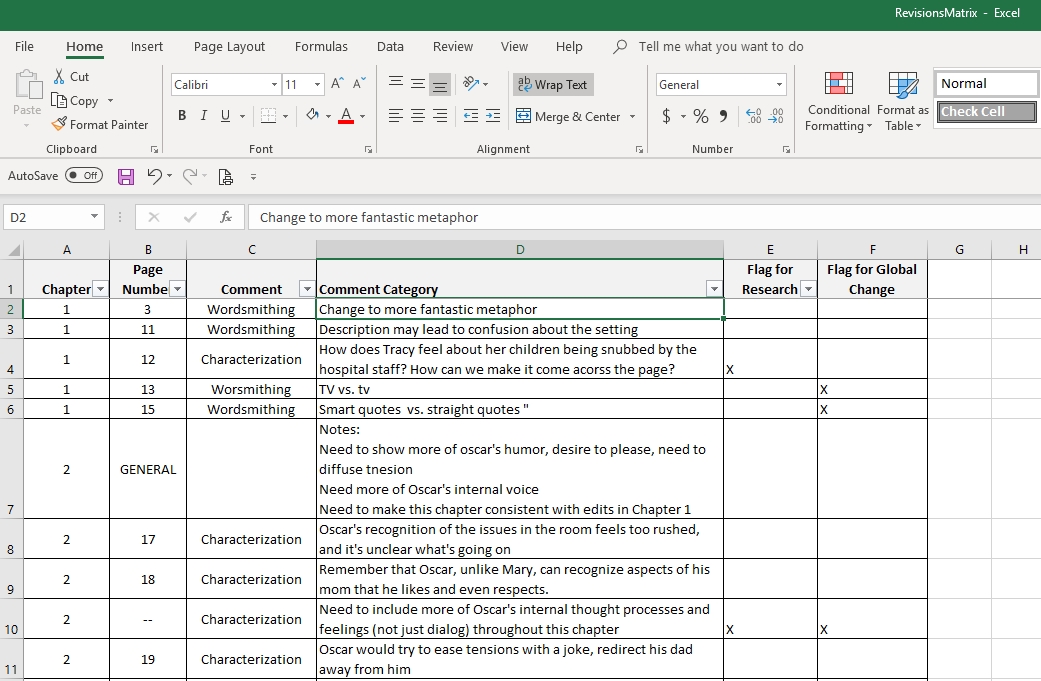
One nice thing about the category system I mentioned earlier, besides that it makes the review process easier, it also makes transferring, tracking, and making edits easier. For Footfall, I’m transferring my hand-markups (color-coded with categories) into an Excel spreadsheet, which will serve as a list of edits I need to make. Each category will be included in the spreadsheet, and then I can filter my comments by category, allowing me to make much smaller, more manageable to-do lists, rather than trying to tackle the whole edit with everything I need to do swimming in my head. Also, I’m adding a column to flag items that are global (like name changes) and items that need to do more research on before making the edit (like characterization or worldbuilding holes). This further narrows my field of edits and helps me prioritize what I need to do first, again, making the process easier for me and less overwhelming. I’m just starting on this step myself, but already finding it much simpler than how I used to tackle hard copy edits (that is, having the hard copy in front of me and just transferring the edits to the story as I go).
I love doing hard copy markups. I know some people might cringe at the paper waste, but I don’t do very many (I think this is my third for Footfall, but that’s spread out over 6 years) and I think the value of the process far out ways the costs.
Anyway, does anyone else like like to review a hard copy? Or is everyone word processor only? I’m curious what everyone’s preference is, so please share in the comments 🙂

Leave a comment